Battle of Majuba Hill
The Battle of Majuba Hill was fought on 27 February 1881 on the Natal-Transvaal border, the last action of the First Boer War. Major-General Sir George Colley occupied the flat-topped hill overlooking the Boer positions at Laing's Nek with about 400 men during the night. In the morning Boer riflemen climbed the slopes under cover of fire and drove the British off the summit, killing Colley and nearly 100 of his men for the loss of one or two of their own. Britain gave the Transvaal back its independence, and 'Remember Majuba' became a British war cry eighteen years later.
Also known as Majuba, Majuba Hill, Amajuba, Slag van Majuba, Battle of Majuba, Majuba 1881, Majuba Day, First Boer War Majuba, Colley's defeat, Transvaal War 1881, First Anglo-Boer War battle, Remember Majuba
Background
Britain annexed the Transvaal in 1877, when the republic was bankrupt and losing a war with the Pedi, and promised it self-government that never came. On 16 December 1880 the Boers proclaimed their republic again at Paardekraal, and four days later a commando ambushed a column of the 94th Regiment at Bronkhorstspruit, killing or wounding most of it. The British garrisons in the Transvaal were besieged. Major-General Sir George Pomeroy Colley, governor of Natal and commander in south-eastern Africa, gathered a field force of about 1,200 men and marched to relieve them, but the Boers under Commandant-General Piet Joubert held the pass of Laing's Nek, where the road crossed the Drakensberg into the Transvaal. Colley's frontal attack on the Nek on 28 January 1881 was beaten off with heavy loss, and on 8 February a force escorting his supply line was mauled at the Ingogo River. Both sides were negotiating by late February, but Colley, reinforced and under pressure to redeem his reputation, decided to seize Majuba, the 2,000-foot hill that rose west of the Nek and looked down on the Boer camps.
The Battle
On the night of 26 February Colley led about 400 men up the mountain: companies of the 58th Regiment, the 92nd Gordon Highlanders and the 3rd/60th Rifles, with a Royal Navy brigade of bluejackets, and no artillery. They reached the broad, saucer-shaped summit before dawn, exhausted, and Colley, believing the position impregnable, did not have them entrench. At first light the Boers in the camps below saw redcoats and kilts on the skyline. Some began to pack their wagons, but Joubert and Commandant Nicolaas Smit organized a storming party of perhaps 350 to 450 men, mostly young, who went up the steep northern and eastern slopes in small groups, each covered by the fire of the men behind. The British on the rim, firing their Martini-Henrys downhill, saw little to shoot at and were picked off by Boers who shot from cover, aimed at every head that showed, and moved only when the fire of their comrades kept the defenders down.
By about noon the Boers had reached the rim of the summit in strength. A rush broke the thin British line on the north side, the reserve in the hollow was shot down as it tried to form, and panic spread through the mixed detachments. Colley, trying to rally his men near the rear of the summit, was shot through the head. The survivors fled down the southern slope, many falling or surrendering, and the Boers fired on them from the crest until they were out of range. The British lost 92 killed, 134 wounded and 59 prisoners, more than half the force on the hill. The Boers lost one man killed and five or six wounded, one of whom later died.
Weapons
Both armies fought with the same class of weapon, the single-shot breech-loading rifle, and the difference lay in how it was used. The British carried the Martini-Henry Rifle, a powerful .450 black-powder rifle, and had been trained to fire volleys at the word of command at ranges set by their officers. Their soldiers were mostly young recruits who had never fired at a man, and the black-powder smoke of their volleys marked their positions on the rim. The Boers carried Westley Richards falling-block rifles, Martini-Henrys bought on the open market or taken from the British, and sporting rifles, and they shot as they hunted, from cover, at a chosen target, with a rest when they could get one. They also used the ground, climbing in the dead space under the rim where the British could not see them without standing up. Colley had brought no artillery, Gatlings or rockets up the hill, and the Boers used none.
Aftermath
Majuba ended the war. The British government, which had been ready to settle before the battle, signed an armistice in March and the Pretoria Convention in August 1881, restoring the Transvaal's self-government under a British suzerainty that was never defined. The battle was a humiliation out of proportion to its size, and it taught the Boers that they could beat British regulars; the lesson the British Army drew, that it needed marksmanship, open order and khaki in place of volleys, close order and scarlet, was learned slowly and had to be learned again in 1899. "Remember Majuba" was the cry of British troops in the second war, and General Cronjé's surrender at the Battle of Paardeberg on the battle's nineteenth anniversary, 27 February 1900, was taken in Britain as the debt repaid. Majuba Day was kept by Afrikaners into the twentieth century.
Weapons used
-
Martini-Henry Rifle
The British infantry and naval brigade on the summit fired the single-shot Martini-Henry, and many of the Boers climbing the hill carried… Continued…
-
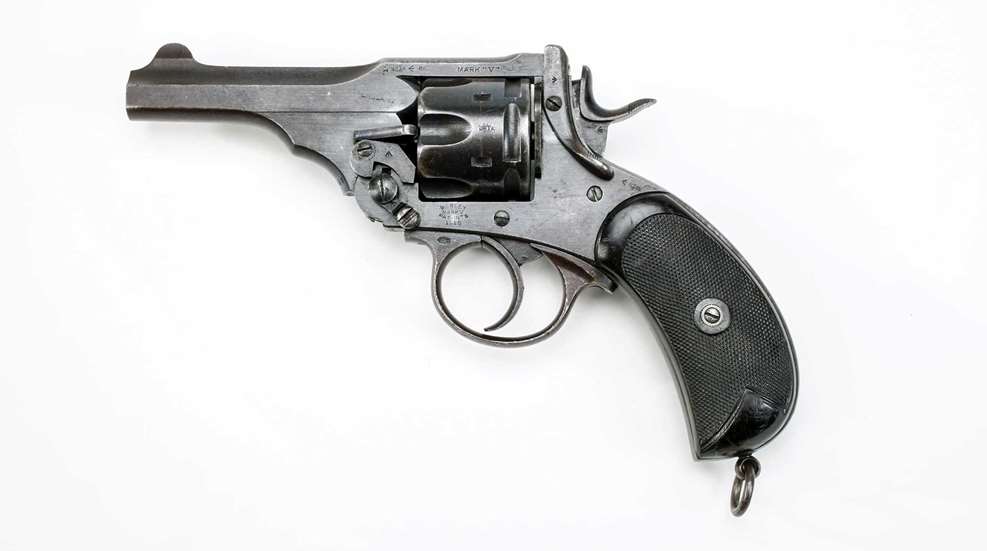
Webley Revolver
British officers of 1881 carried privately bought revolvers of the Webley pattern, forerunners of the service Webley adopted six years… Continued…
Sources
Laband, John. The Transvaal Rebellion: The First Boer War, 1880-1881. Pearson Longman, 2005.
Castle, Ian. Majuba 1881: The Hill of Destiny. Osprey, 1996.
Ransford, Oliver. The Battle of Majuba Hill: The First Boer War. John Murray, 1967.
Duxbury, George. David and Goliath: The First War of Independence, 1880-1881. South African National Museum of Military History, 1981.
Suggest an edit · account required · reviewed before publishing · how it works