Battle of Colenso
The Battle of Colenso was fought on 15 December 1899 on the Tugela River in Natal, the third British defeat of Black Week. General Sir Redvers Buller, trying to force the river and relieve Ladysmith, attacked Louis Botha's entrenched Boers without reconnaissance. One brigade was trapped in a loop of the river, the field artillery was galloped into rifle range and lost ten guns, and Buller called off the battle by mid-morning with over a thousand casualties against about forty Boers. He was replaced as commander-in-chief by Lord Roberts, whose only son died winning the Victoria Cross at the guns.
Also known as Colenso, Slag van Colenso, Colenso 1899, Black Week Colenso, Tugela battle, Buller's defeat at Colenso, Long's guns, Freddie Roberts VC, Hart's Irish Brigade Colenso, first relief of Ladysmith, Battle of the Tugela, Colenso guns
Background
In the first weeks of the war the Boers invaded Natal and shut up Sir George White's army of 12,000 men in Ladysmith. General Sir Redvers Buller, the British commander-in-chief, came to Natal himself with the bulk of the army corps from England and by December had about 21,000 men and 44 guns at Frere, south of the Tugela River, which lay between him and the besieged town. The Boers under Louis Botha, a 37-year-old farmer who had just taken command of the Natal forces, held the north bank with about 4,500 men. The village of Colenso stood at the river's most obvious crossing, where the railway bridge had been blown and a road bridge still stood, and the Boers had entrenched along the bank and on the hills behind it, with great care to hide the trenches and to leave the bridge standing as bait. Buller had planned to cross upstream at Potgieter's Drift, but after the news of Stormberg and the Battle of Magersfontein he changed his mind and decided on a frontal attack at Colenso.
The Battle
The attack began at dawn on 15 December with a bombardment by the naval guns that drew no reply; the Boers had orders to hold their fire. Major-General Fitzroy Hart's Irish Brigade, on the left, was to cross at a ford upstream, but Hart's guide led the brigade, still in close column, into a loop of the river where it was shut in on three sides by water and Boer trenches. The Boers opened fire from across the river at a few hundred yards. The Irish battalions deployed as best they could, some companies reaching the bank, but they could find no ford and no target, and lay under fire for hours until Buller ordered them out, with over 500 casualties.
In the center Colonel Charles Long, commanding the artillery, took the twelve 15-pounders of the 14th and 66th Batteries and six naval 12-pounders forward far ahead of the infantry, at a trot, and unlimbered on open ground less than a thousand yards from the river, in the belief that close action was what the guns were for. The Boer trenches along the bank opened fire, and within half an hour the gun detachments were shot down, Long badly wounded, and the guns silent for want of men and ammunition. Buller, who had come forward, called for volunteers to bring them out. Corporal George Nurse, Captain Walter Congreve, Captain Harry Schofield and Lieutenant Frederick Roberts, the only son of Field Marshal Lord Roberts, rode out with limber teams under fire and brought back two guns; Roberts was mortally wounded, and all four received the Victoria Cross, as did Captain Hamilton Reed, who led a second attempt, Major William Babtie of the Army Medical Corps, who tended the wounded under fire, and Private George Ravenhill. The remaining ten guns were abandoned, and the Boers crossed in the afternoon and took them, with the wounded gunners who had sheltered in a donga. By mid-morning Buller, who had been bruised by a shell fragment, had ordered a general withdrawal. The British lost 143 killed, about 750 wounded and 240 captured, some 1,130 in all; the Boers lost about 40 killed and wounded.
Weapons
Colenso was decided by the hidden trench and the smokeless rifle. Botha's burghers with the Mauser Model 1895 fired from positions that the British artillery could not find and the infantry could not see, at ranges where the Mauser's flat trajectory was deadly against men standing or kneeling in the open. The British infantry's Lee-Enfield Rifle and Lee-Metford Rifle were as good, but a rifle needs a target. The Ordnance BL 15-pounder had been designed for an artillery duel at 3,000 or 4,000 yards; Long's decision to fight it at less than a thousand from an entrenched enemy, in the open and without infantry support, turned the gun lines into a rifle range. The Boer QF 1-pounder Pom-Pom and the Maxim Gun added to the fire on the guns and the Irish Brigade, and the Boer artillery on the hills, which had held its fire during the British bombardment, joined in once the attack was committed.
Aftermath
Colenso closed Black Week. Buller telegraphed to White in Ladysmith suggesting that he might have to surrender, and to London in terms that cost him the supreme command; Lord Roberts was appointed commander-in-chief in South Africa with Kitchener as his chief of staff, and Buller was left to command in Natal. He tried the Tugela again in January at the Battle of Spion Kop and at Vaal Krantz in February before breaking through to Ladysmith on 28 February 1900. The guns lost at Colenso were used by the Boers against their former owners. For the Royal Artillery the battle was a bitter argument about how field guns should be fought, and for the army as a whole it was the final proof that frontal attacks without reconnaissance against entrenched riflemen could not succeed.
Weapons used
-
Ordnance BL 15-pounder
Colonel Long's twelve 15-pounders were galloped to within a thousand yards of the hidden Boer trenches; ten were lost, and the attempts to… Continued…
-
Mauser Model 1895
Botha's 4,500 burghers, in trenches along the river, shot the gun detachments and Hart's brigade to a standstill with Mauser fire. Continued…
-
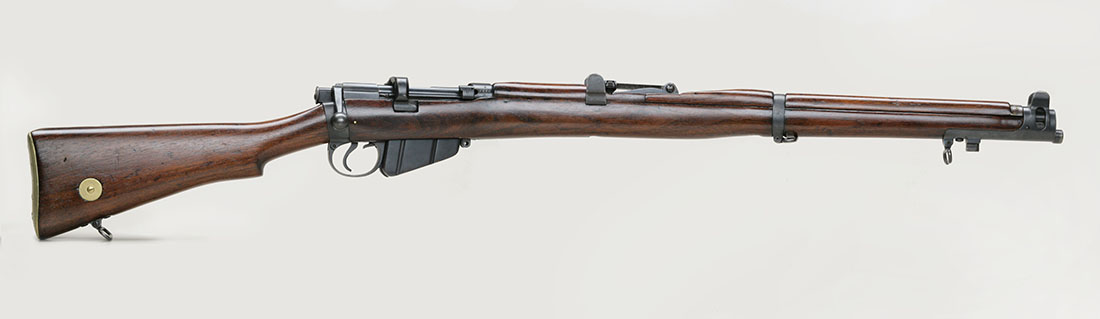
Lee-Enfield Rifle
Buller's infantry carried the Lee-Enfield and Lee-Metford, but in the loop of the Tugela the Irish Brigade found nothing to fire at. Continued…
-
Lee-Metford Rifle
The Lee-Metford still armed many of the battalions of Buller's Natal Field Force. Continued…
-
QF 1-pounder Pom-Pom
Boer pom-poms on the far bank shelled the British guns and infantry. Continued…
-
Maxim Gun
Machine guns on both sides; the naval brigade's and the Boers' were in action around the railway bridge. Continued…
-
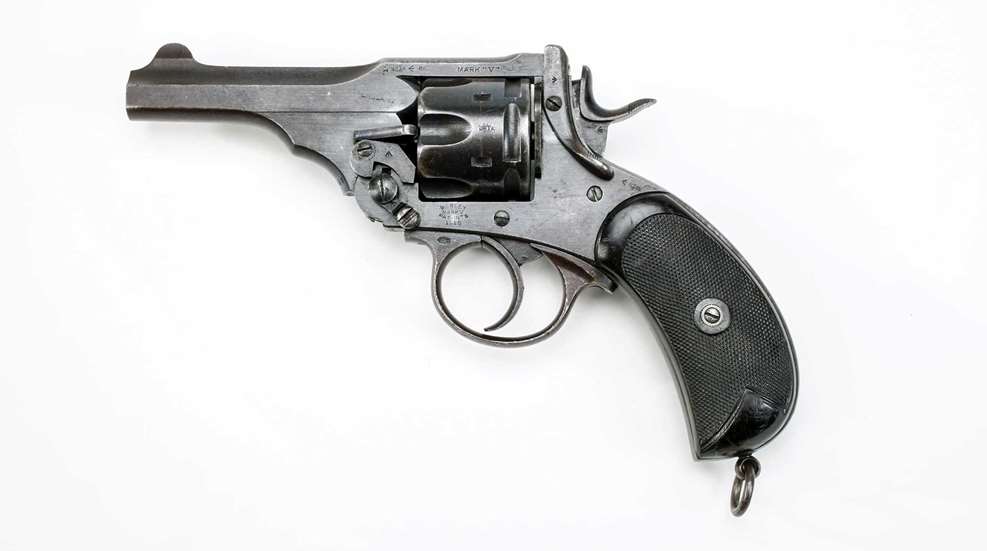
Webley Revolver
The service revolver of the British officers who led the attempts to rescue Long's guns. Continued…
Sources
Knight, Ian. Colenso 1899: The Boer War in Natal. Osprey, 1995.
Pakenham, Thomas. The Boer War. Weidenfeld & Nicolson, 1979.
Nasson, Bill. The War for South Africa: The Anglo-Boer War, 1899-1902. Tafelberg, 2010.
Amery, L. S., ed. The Times History of the War in South Africa, 1899-1902. Vol. 2. Sampson Low, Marston, 1902.
Suggest an edit · account required · reviewed before publishing · how it works