Battle of Spion Kop
The Battle of Spion Kop was fought on 23-24 January 1900 on the Tugela Heights in Natal, during Buller's second attempt to relieve Ladysmith. A British force took the summit of the hill in the night, dug a shallow trench in the wrong place, and at dawn found itself under rifle and artillery fire from three sides with no cover and no help. After a day of slaughter the survivors withdrew in the dark, just as the Boers, who thought themselves beaten, were leaving too. Over 1,400 British soldiers were killed and wounded, and Louis Botha, Winston Churchill and Mohandas Gandhi were all on the hill.
Also known as Spion Kop, Spioenkop, Spion Kop 1900, Slag van Spioenkop, Battle of Spioenkop, Spy Hill, Buller's second Tugela battle, Warren at Spion Kop, Thorneycroft's Mounted Infantry, Woodgate's hill, Tugela Heights, Spion Kop trench, Anfield Spion Kop, Kop
Background
After the Battle of Colenso, Sir Redvers Buller spent a month preparing a second attempt to reach Ladysmith, this time by crossing the Tugela well upstream and turning the Boer right. In mid-January 1900 he sent Lieutenant-General Sir Charles Warren with about 15,000 men across the river at Trichardt's Drift, west of the heights, while a smaller force under Lyttelton crossed at Potgieter's Drift. Warren spent several days moving his transport and probing the Rangeworthy hills while the Boers under Louis Botha brought up commandos to meet him, and on 22 January, with Buller's agreement, he decided to take Spion Kop, "spy hill," the highest point of the range, 1,470 feet above the river, which seemed to command the Boer positions on either side.
The Battle
On the night of 23 January Major-General Edward Woodgate led about 1,700 men up the south-western spur in mist and darkness: the Lancashire Fusiliers, Royal Lancaster Regiment, a company of South Lancashires, Thorneycroft's Mounted Infantry on foot, and Royal Engineers. They surprised the small Boer picket on top, cheered, and began to dig in. In the fog the engineers laid out a trench about 300 yards long across what seemed the crest; the ground was rock a few inches down, and the trench was never more than a shallow scrape fronted with stones. When the mist lifted after dawn it showed the position to be a disaster. The real crest lay further forward, so the trench could not see the slopes below it, and it was overlooked at a few hundred yards by Aloe Knoll to the east, Conical Hill to the north and the Twin Peaks beyond, all held or soon held by Boers, who also had Krupp field guns and a pom-pom in range on the hills around.
Botha, who had rallied his men when many had been ready to leave, sent the Carolina and Pretoria commandos and others up the northern slopes, and from about eight in the morning the summit was under fire from three sides. Woodgate was shot through the head and died later; command passed by confusion through several officers until Buller, watching from across the river, ordered that Lieutenant-Colonel Alexander Thorneycroft take charge. Through a cloudless day the British lay packed in the trench and on the bare plateau behind it, hit by rifle fire at close range and by shrapnel and pom-pom shells, with no water, their dead and wounded piling up where they fell. Reinforcements sent up, the Middlesex, the Scottish Rifles and the Imperial Light Infantry, added to the crowd and the casualties. Some of the Lancashire Fusiliers tried to surrender in the afternoon and Thorneycroft refused to allow it. On the right, Lyttelton's King's Royal Rifle Corps stormed the Twin Peaks and drove the Boers off them, which might have changed the battle, but they were ordered back after dark. Warren sent no guns up and little word down. At nightfall Thorneycroft, without orders from a general who had none to give, took the survivors off the hill. The Boers, who had lost heavily and believed the British would renew the attack, had also abandoned the summit; two Boer scouts climbed it in the morning and found only the dead. The British lost about 1,500 men, around 300 of them killed; Boer losses were about 335, of whom 68 were killed.
Weapons
Spion Kop showed what magazine rifles and quick-firing guns could do to infantry on a bare hilltop without cover or artillery of their own. The Boers' Mauser Model 1895, fired from the higher ground on three sides at two to four hundred yards, dominated the trench, and the QF 1-pounder Pom-Pom walked its bursts along it; the Boer Krupp guns, laid on the summit by observers who could see every movement, fired shrapnel all day. The British on top had the Lee-Enfield Rifle and the Lee-Metford Rifle, and fired them hard when they could see a target, but a rifleman in the open against a rifleman behind rocks is at a disadvantage that no weapon makes up. The Maxim Gun went up with the reinforcements; the British field guns, the Ordnance BL 15-pounder, stayed below, since no one managed to get them or the mountain battery up the track. Shovels, in the end, were the weapons the British most needed and least had: a deep trench on the true crest would have changed everything.
Aftermath
Buller withdrew across the Tugela again, tried once more at Vaal Krantz in February, and finally broke through to Ladysmith on 28 February 1900 by a methodical attack along the Tugela Heights with all his artillery. Spion Kop became the most notorious British defeat of the war, a byword for muddle: Warren was blamed by Buller, Buller by London, and the reports were published and argued over for years. On the hill that day were Winston Churchill, a war correspondent and lieutenant of the South African Light Horse who carried messages up and down the slope; Mohandas Gandhi, serving with the Indian stretcher-bearer corps that carried the wounded down; and Louis Botha, commanding the Boers, who all three later led governments. The trench on the summit is still the mass grave of the men who died in it. English football clubs named their steep terraces "the Kop" in its memory, Liverpool's Anfield among them.
Weapons used
-
Mauser Model 1895
Boer riflemen on Aloe Knoll, Conical Hill and the Twin Peaks poured Mauser fire into the crowded summit trench from three sides. Continued…
-
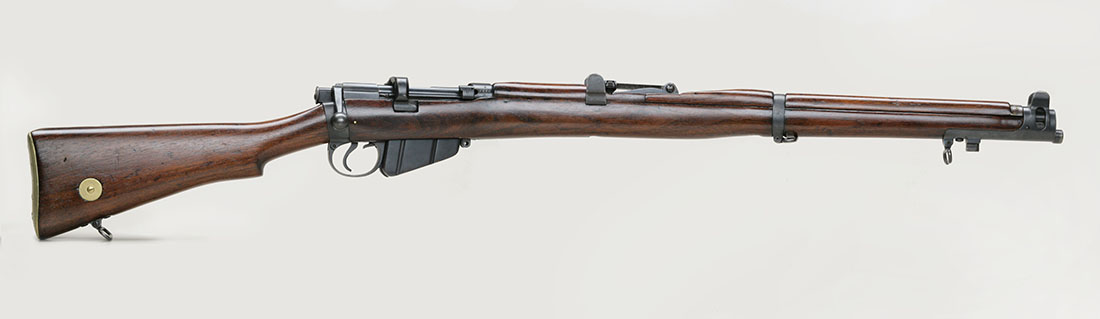
Lee-Enfield Rifle
The British infantry on the summit fought back with Lee-Enfields and Lee-Metfords against riflemen they could barely see. Continued…
-
Lee-Metford Rifle
Many of Woodgate's battalions still carried the Lee-Metford in January 1900. Continued…
-
QF 1-pounder Pom-Pom
A Boer pom-pom swept the summit from the north-east, bursting its strings of shells among the packed troops. Continued…
-
Maxim Gun
British Maxims were dragged to the summit; the Boers had theirs with the Krupp guns on the hills around. Continued…
-
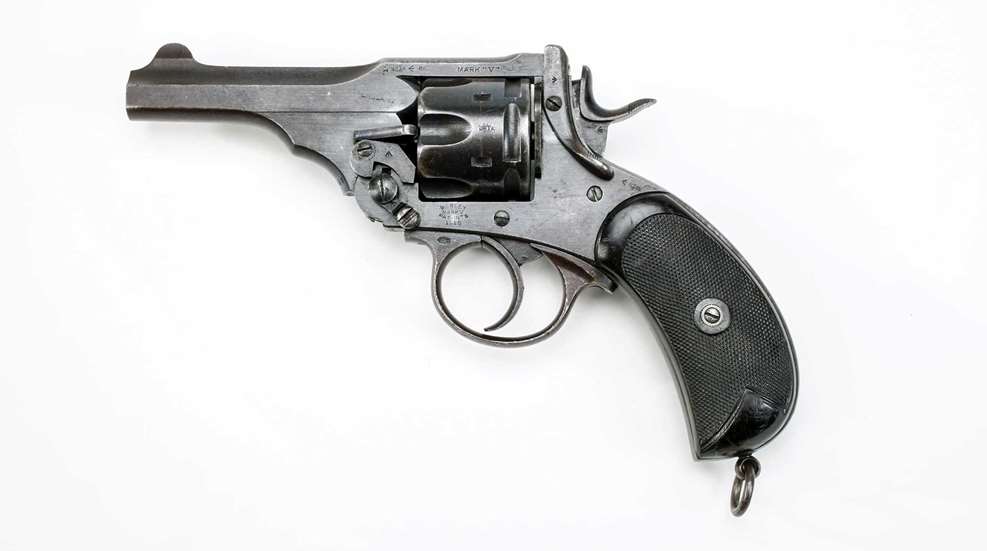
Webley Revolver
The British officers who held the shallow trench through the day, Thorneycroft among them, carried the Webley. Continued…
Sources
Pakenham, Thomas. The Boer War. Weidenfeld & Nicolson, 1979.
Ransford, Oliver. The Battle of Spion Kop. John Murray, 1969.
Nasson, Bill. The War for South Africa: The Anglo-Boer War, 1899-1902. Tafelberg, 2010.
Churchill, Winston S. London to Ladysmith via Pretoria. Longmans, Green, 1900.
Suggest an edit · account required · reviewed before publishing · how it works