Battle of Magersfontein
The Battle of Magersfontein was fought on 11 December 1899 south of Kimberley, the second British defeat of Black Week. Lord Methuen's column, marching to relieve Kimberley, attacked the Boer army of Piet Cronjé and Koos de la Rey in the dark, expecting it to be on the hills; instead it lay in trenches at their foot, and at dawn the Highland Brigade, still in close column, was shot to a standstill by Mauser fire from a few hundred yards. Its commander was killed and the brigade lay pinned on the open veld all day. The British lost nearly a thousand men and the relief of Kimberley was stopped for two months.
Also known as Magersfontein, Slag van Magersfontein, Magersfontein 1899, Black Week Magersfontein, Highland Brigade Magersfontein, Wauchope's death, Methuen's defeat, Modder River campaign, Kimberley relief battle, Magersfontein trenches
Background
When the Boers besieged Kimberley, the diamond town on the Cape-Orange Free State border where Cecil Rhodes was shut up, Lieutenant-General Lord Methuen was sent north along the railway with about 10,000 men to relieve it. He fought his way through Boer rearguards at Belmont and Graspan and across the Modder River at the end of November 1899, each time by frontal attack and at growing cost, and halted on the Modder to bring up reinforcements, including the Highland Brigade under Major-General Andrew Wauchope. Between him and Kimberley, twenty miles on, General Piet Cronjé's Free State and Transvaal commandos, about 8,500 men, had taken position on the line of hills at Magersfontein. On the advice of Koos de la Rey, who had seen what Mauser fire from low ground could do at the Modder, the Boers did not dig in on the heights, where British shrapnel would find them and their rifles would fire down at a steep angle. They dug a line of narrow trenches along the foot of the hills, ten to twelve miles long, screened by brush and wire, where their rifles could sweep the flat veld in front at grazing height.
The Battle
On the afternoon of 10 December Methuen's artillery, with a 4.7-inch naval gun, bombarded Magersfontein Hill for two hours with lyddite and shrapnel, a show that impressed the watching infantry and killed almost no one, since the Boers were not on the hill. That night the Highland Brigade, nearly 4,000 men of the Black Watch, Seaforths, Argylls and Highland Light Infantry, marched toward the hill in close column, each man holding the man in front, through rain and darkness, guided by compass, with the plan of deploying for a dawn assault on the heights. They were still in column, a few hundred yards from the hidden trenches, when the sky began to lighten and the Boer line opened fire. Wauchope was killed almost at once. The leading battalions tried to deploy under a fire that cut down anyone who stood, some men charged toward the hill and were shot down at the wire, and the rest went to ground on the bare veld.
There they stayed through the whole of a hot December day, pinned by rifle and pom-pom fire, unable to advance or retire, with no cover but ant-hills and the bodies of the dead. Methuen's other brigades made no serious attempt to break the line elsewhere, and British artillery, firing from behind, could not see the trenches. Late in the afternoon part of the Highland line broke and ran, and the brigade drew back with heavy loss. The next day Methuen asked for an armistice to bury his dead and withdrew to the Modder. The British had lost about 950 men killed, wounded and missing, over 700 of them Highlanders; Boer losses were about 250, many of them in the Scandinavian Corps, a small volunteer unit that had been posted in front of the line and was overrun.
Weapons
Magersfontein was a lesson in what the smokeless magazine rifle could do from a trench. The Boers' Mauser Model 1895 fired without smoke or flash to betray a position, and from trenches dug at the foot of a hill its bullets swept the ground ahead at the height of a man for a thousand yards. The British had rifles as good, the Lee-Metford Rifle and the Lee-Enfield Rifle, but no targets; their training in volley fire by sections and their advance in close column, meant to keep the brigade together in the dark, delivered them to the trenches in a mass. The Ordnance BL 15-pounder and the naval gun could only shell what their observers could see, which was the empty hill, and their shrapnel would have done little against trenches in any case. The Boer QF 1-pounder Pom-Pom fired on the pinned Highlanders and the gun lines through the day, and Maxim Guns were in action on both sides.
Aftermath
Magersfontein, Stormberg the day before and the Battle of Colenso four days later made up Black Week, the worst series of defeats the British Army had suffered in living memory. Methuen stayed on the Modder for two months until Lord Roberts arrived with a new army and turned Cronjé's position by marching round it, which led to the relief of Kimberley on 15 February 1900 and to the trapping of Cronjé at the Battle of Paardeberg. The disaster to the Highland Brigade, the most famous formation in the army, shook Britain; recruiting surged and Scottish towns held public mourning. For the army the battle, with Colenso, was the clearest argument that the frontal attack in close order was finished, and the reforms in training, formation and artillery that followed can be traced to the morning at the foot of Magersfontein Hill.
Weapons used
-
Mauser Model 1895
The Boers in the trenches at the foot of the hill fired their smokeless 7 mm Mausers into the Highland Brigade at dawn from a few hundred… Continued…
-
Lee-Metford Rifle
Methuen's infantry carried the .303 Lee-Metford and Lee-Enfield; pinned on open ground, they could find nothing to aim at. Continued…
-
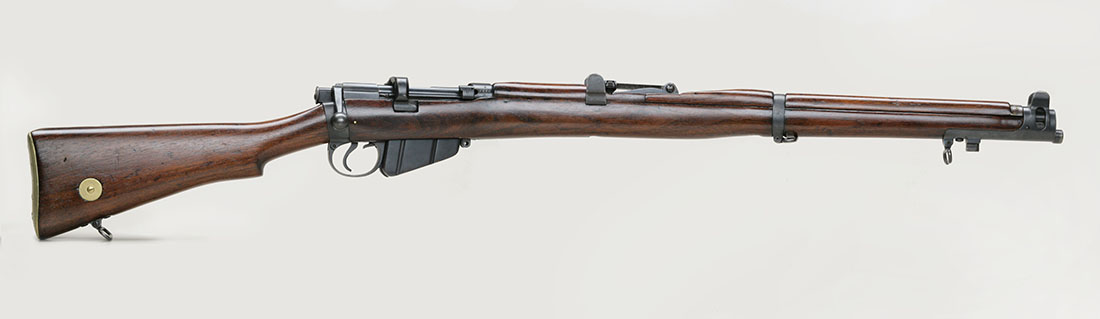
Lee-Enfield Rifle
The Long Lee-Enfield served beside the Lee-Metford in the Highland and Guards brigades. Continued…
-
Ordnance BL 15-pounder
The British field batteries and a 4.7-inch naval gun bombarded the hilltop for hours on 10 December, missing the trenches at its foot… Continued…
-
QF 1-pounder Pom-Pom
Boer pom-poms shelled the pinned Highlanders and the British gun lines through the day. Continued…
-
Maxim Gun
Both sides had Maxims; the Boers' were served by the Staatsartillerie and the Scandinavian Corps. Continued…
-
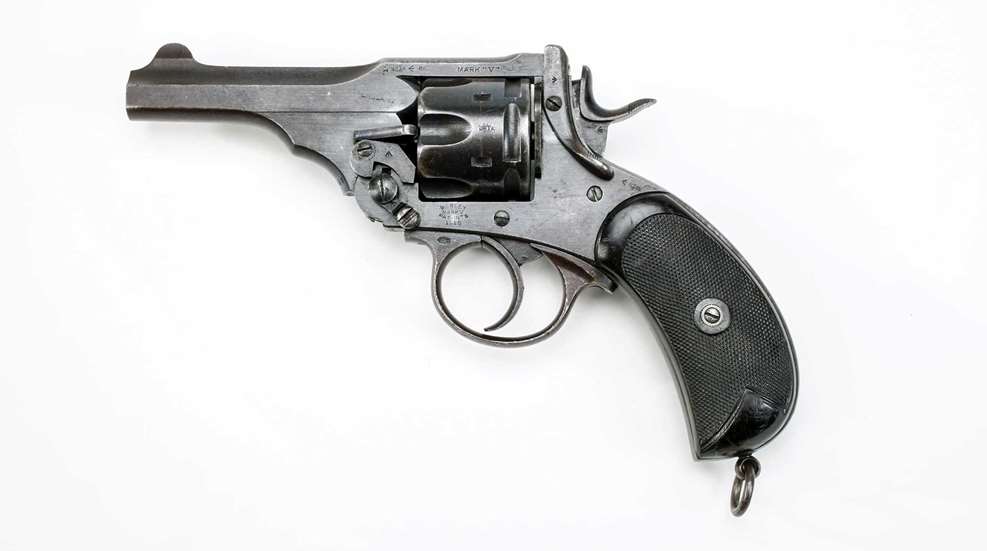
Webley Revolver
British officers, who led from the front and suffered in proportion, carried the Webley. Continued…
Sources
Pakenham, Thomas. The Boer War. Weidenfeld & Nicolson, 1979.
Nasson, Bill. The War for South Africa: The Anglo-Boer War, 1899-1902. Tafelberg, 2010.
Judd, Denis, and Keith Surridge. The Boer War. John Murray, 2002.
Amery, L. S., ed. The Times History of the War in South Africa, 1899-1902. Vol. 2. Sampson Low, Marston, 1902.
Suggest an edit · account required · reviewed before publishing · how it works